Kubernetes and PSO Step by Step
kubernetes
Kubernetes is quite popular these days, whilst its great for scalable apps such as modern analytics, machine learning and AI. The Feasibility of running production databases on Kubernetes is something that needs to be considered carefully.
In this blog I will go through a step-by-step guide on setting up a Kubernetes cluster including a Master and Worker nodes, as well as PSO ( Pure Storage Orchestrator ) for kubernetes integration and storage provisioning.
In the following blog I will setup an Oracle database with persistent storage using Pure Storage and PSO.
Cluster Environment
The Kubernetes cluster is build on 2 Virtual Machines each with 6 vCPUs and 16G or Ram, the software components are listed below. Pure Service Orchestrator is used to integrate Kubernetes and Pure Storage.
Configuration
| Role | FQDN | IP | OS | RAM | CPU |
|---|---|---|---|---|---|
| Master | oraslob | 10.226.225.112 | OEL 7.7 | 16G | 6 |
| Worker | oraslob1 | 10.226.225.113 | ORL 7.7 | 16G | 6 |

Benefits of This Architecture
- A seamless integration of technologies allows us to rapidly automate the creation of application containers and scale those app across cluster node
- Rapidly automate the allocation of storage to containers requiring persistent volumes, with PSO integration this now takes seconds
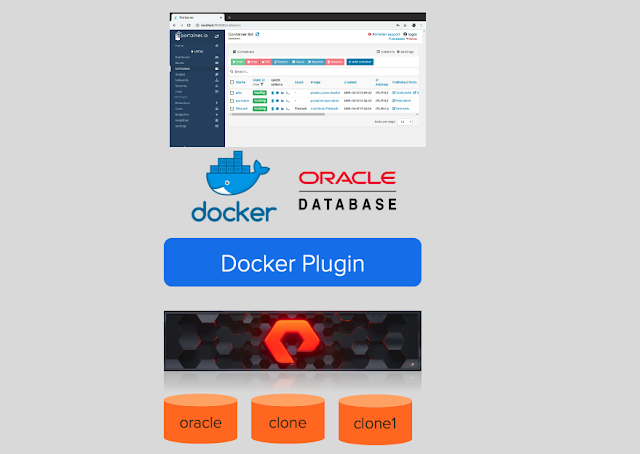
- With our Kubernetes ad PSO integration, we can take snapshots of persistent volumes and present those snapshots as clones to other containers.
- Manage both file and block integrations through PSO, FlashArray and FlashBlade
NOTE: Whilst this is running on VMware, this can just as easily run on bare metal servers, It's just more convenient for me to run this up in our VMware LAB. Running on VMware also allows for management of the FlashArrays through out VMware plugin, Allowing for a single pain of glass for management of the virtual infrastructure and storage.
Setup Master Node
Update the OEL linux with latest patches
# yum update -y
Disable swap on the host
# swapoff -a
To permanently disable swap, comment the swap entry the /etc/fstab file
Disable the firewall
# systemctl stop firewalld
# systemctl disable firewalld
Add the Master node and worker nodes to the /etc/hosts file on each host Create the Kubernetes repository
[kubernetes]
name=Kubernetes
baseurl=https://packages.cloud.google.com/yum/repos/kubernetes-el7-x86_64
enabled=1
gpgcheck=1
repo_gpgcheck=1
gpgkey=https://packages.cloud.google.com/yum/doc/yum-key.gpg
       https://packages.cloud.google.com/yum/doc/rpm-package-key.gpg
Edit the oracle-linux-ol7.repo and edit the [ol7_addons] section, set enabled=1
name=Oracle Linux $releasever Add ons ($basearch)
baseurl=https://yum$ociregion.oracle.com/repo/OracleLinux/OL7/addons/$basearch/
gpgkey=file:///etc/pki/rpm-gpg/RPM-GPG-KEY-oracle
gpgcheck=1
enabled=1
Install the following packages ( kubeadm, docker, docker-engine )
# yum install kubeadm docker docker-engine -y
Start and enable service
# systemctl start docker && systemctl enable docker
# systemctl start kubelet && systemctl enable kubelet
Create the new Kubernetes cluster and private cluster network pod
# kubeadm init --pod-network-cidr=172.17.0.0/16
Once the cluster config completes run the following commands which will be displayed at end of the output
# mkdir -p $HOME/.kube
# sudo cp -i /etc/kubernetes/admin.conf $HOME/.kube/config
# sudo chown $(id -u):$(id -g) $HOME/.kube/config
Make note of the command at the end of the cluster output, this shows the command required for each of the worker nodes to join the cluster
# kubeadm join 10.226.225.112:6443 --token s85gcm.acivz6ljwjer9kgj --discovery-token-ca-cert-hash sha256:616a7cd70876758f36ef8ccfc5f9381c33dba63a50cedaf98ce0a713fc08c6d6
Check the state of the docker images being downloaded
       REPOSITORY                           TAG                 IMAGE ID            CREATED             SIZE
        k8s.gcr.io/kube-proxy                v1.18.2             0d40868643c6        3 days ago          117MB
        k8s.gcr.io/kube-apiserver            v1.18.2             6ed75ad404bd        3 days ago          173MB
        k8s.gcr.io/kube-controller-manager   v1.18.2             ace0a8c17ba9        3 days ago          162MB
        k8s.gcr.io/kube-scheduler            v1.18.2             a3099161e137        3 days ago          95.3MB
        quay.io/coreos/flannel               v0.12.0-amd64       4e9f801d2217        5 weeks ago         52.8MB
        k8s.gcr.io/pause                     3.2                 80d28bedfe5d        2 months ago        683kB
        k8s.gcr.io/coredns                   1.6.7               67da37a9a360        2 months ago        43.8MB
        kubernetesui/dashboard               v2.0.0-beta8        eb51a3597525        4 months ago        90.8MB
        k8s.gcr.io/etcd                      3.4.3-0             303ce5db0e90        5 months ago        288MB
        kubernetesui/metrics-scraper         v1.0.1              709901356c11        9 months ago        40.1MB
Download the flannel virtual network overlay flannel is a virtual network that gives a subnet to each host for use with container runtimes. Platforms like Google's Kubernetes assume that each container (pod) has a unique, routable IP inside the cluster. The advantage of this model is that it reduces the complexity of doing port mapping.
# kubectl apply -f https://raw.githubusercontent.com/coreos/flannel/master/Documentation/kube-flannel.yml
Check the status of the cluster namespace ( note the flannel overlay )
# kubectl get pods --all-namespaces

       NAMESPACE              NAME                                          READY   STATUS    RESTARTS   AGE
       kube-system            coredns-66bff467f8-k8bsz                      1/1     Running   0          11h
       kube-system            coredns-66bff467f8-kzhgm                      1/1     Running   0          11h
       kube-system            etcd-oraslob.localdomain                      1/1     Running   0          11h
       kube-system            kube-apiserver-oraslob.localdomain            1/1     Running   0          11h
       kube-system            kube-controller-manager-oraslob.localdomain   1/1     Running   0          11h
       kube-system            kube-flannel-ds-amd64-gv2ng                   1/1     Running   0          9h
       kube-system            kube-flannel-ds-amd64-gwd5z                   1/1     Running   0          11h
       kube-system            kube-proxy-dxcwb                              1/1     Running   0          9h
       kube-system            kube-proxy-r8rrw                              1/1     Running   0          11h
       kube-system            kube-scheduler-oraslob.localdomain            1/1     Running   0          11h
       kubernetes-dashboard   dashboard-metrics-scraper-694557449d-7dzvb    1/1     Running   0          9h
       kubernetes-dashboard   kubernetes-dashboard-9774cc786-lkv44          1/1     Running   0          9h
Get the status of the cluster
# kubeclt get nodes
   NAME                   STATUS   ROLES    AGE   VERSION
   oraslob.localdomain    Ready    master   11h   v1.18.2
Run the ip -a command to get the network status, notice the docker and flannel interfaces
docker0: mtu 1500 qdisc noqueue state DOWN group default
   link/ether 02:42:07:c1:d3:d6 brd ff:ff:ff:ff:ff:ff
   inet 172.17.0.1/16 brd 172.17.255.255 scope global docker0
   valid_lft forever preferred_lft forever
flannel.1: mtu 1450 qdisc noqueue
    state UNKNOWN group default
    link/ether ce:4e:31:0f:21:91 brd ff:ff:ff:ff:ff:ff
    inet 172.17.0.0/32 scope global flannel.1
    valid_lft forever preferred_lft forever
    inet6 fe80::cc4e:31ff:fe0f:2191/64 scope link
    valid_lft forever preferred_lft forever
Setup Worker Node
Update the OEL linux with latest patches
# yum update -y
Disable swap on the host
# swapoff -a
To permanently disable swap, comment the swap entry the /etc/fstab file
Disable the firewall
# systemctl stop firewalld
# systemctl disable firewalld
Add the Master node and worker nodes to the /etc/hosts file on each host Create the Kubernetes repository /etc/yum.repos.d/kubernetes.repo
[kubernetes]
name=Kubernetes
baseurl=https://packages.cloud.google.com/yum/repos/kubernetes-el7-x86_64
enabled=1
gpgcheck=1
repo_gpgcheck=1
gpgkey=https://packages.cloud.google.com/yum/doc/yum-key.gpg
       https://packages.cloud.google.com/yum/doc/rpm-package-key.gpg
Edit the oracle-linux-ol7.repo and edit the [ol7_addons] section, set enabled=1
name=Oracle Linux $releasever Add ons ($basearch)
baseurl=https://yum$ociregion.oracle.com/repo/OracleLinux/OL7/addons/$basearch/
gpgkey=file:///etc/pki/rpm-gpg/RPM-GPG-KEY-oracle
gpgcheck=1
enabled=1
Install the following packages ( kubeadm, docker, docker-engine )
# yum install kubeadm docker docker-engine -y
Start and enable services
# systemctl start docker && systemctl enable docker
# systemctl start kubelet && systemctl enable kubelet
Join the Kubernetes Cluster
# kubeadm join 10.226.225.112:6443 --token s85gcm.acivz6ljwjer9kgj --discovery-token-ca-cert-hash sha256:616a7cd70876758f36ef8ccfc5f9381c33dba63a50cedaf98ce0a713fc08c6d6
Check the status of the cluster from the Master Node
# kubectl get nodes
NAME                   STATUS   ROLES    AGE   VERSION
oraslob.localdomain    Ready    master   11h   v1.18.2
oraslob1.localdomain   Ready       10h   v1.18.2
Setup The Dashboard
Run the following command to deploy the Kubernetes dashboard
# kubectl apply -f https://raw.githubusercontent.com/kubernetes/dashboard/v2.0.0-beta8/aio/deploy/recommended.yaml
You can access the dashboard using kubectl
# kubectl proxy
Starting to serve on 127.0.0.1:8001
Once you start the proxy, you can connect to the dashboard from the master
http://localhost:8001/api/v1/namespaces/kubernetes-dashboard/services/https:kubernetes-dashboard:/proxy/.
If you want to access the dashboard from your laptop you will need to do the following Install kubectl on Mac Once installed, run the following command
# mkdir -p $HOME/.kube
# scp -r root@master:/etc/kubernetes/admin.conf $HOME/.kube/config
# chown $(id -u):$(id -g) $HOME/.kube/config
# kubectl get secrets
NAME    TYPE   DATA   AGE
dashboard-admin-sa-token-4lsv8   kubernetes.io/service-account-token   3      9h
# kubectl describe  dashboard-admin-sa-token-4lsv8
Note the token, you need to copy the token and use it to log into the dashboard with
Name:         dashboard-admin-sa-token-4lsv8
Namespace:    default
Labels:
Annotations:  kubernetes.io/service-account.name: dashboard-admin-sa
kubernetes.io/service-account.uid: a15d0480-2eeb-49ce-ad92-4480981b488e
Type:  kubernetes.io/service-account-token

Data
====
ca.crt:     1025 bytes
namespace:  7 bytes
token:
eyJhbGciOiJSUzI1NiIsImtpZCI6InZyaVNyZWcteGNZLVRrUktmUWZlRkxvbXlJVGRQU3VEeGowemRxY3FneG8ifQ.eyJpc3MiOiJrdWJlcm5ldGVzL3NlcnZpY2VhY2NvdW50Iiwia3ViZXJuZXRlcy5pby9zZXJ2aWNlYWNjb3VudC9uYW1lc3BhY2UiOiJkZWZhdWx0Iiwia3ViZXJuZXRlcy5pby9zZXJ2aWNlYWNjb3VudC9zZWNyZXQubmFtZSI6ImRhc2hib2FyZC1hZG1pbi1zYS10b2tlbi00bHN2OCIsImt1YmVybmV0ZXMuaW8vc2VydmljZWFjY291bnQvc2VydmljZS1hY2NvdW50Lm5hbWUiOiJkYXNoYm9hcmQtYWRtaW4tc2EiLCJrdWJlcm5ldGVzLmlvL3NlcnZpY2VhY2NvdW50L3NlcnZpY2UtYWNjb3VudC51aWQiOiJhMTVkMDQ4MC0yZWViLTQ5Y2UtYWQ5Mi00NDgwOTgxYjQ4OGUiLCJzdWIiOiJzeXN0ZW06c2VydmljZWFjY291bnQ6ZGVmYXVsdDpkYXNoYm9hcmQtYWRtaW4tc2EifQ.SWpdwhtXs_QK4XVqdAiWxw3SUg1i7gvInw7gxbJpzu2MJc0p7XQ3CbQ2Mi9yZ-8_PQto4pBf0b_ja-p4pmaLnhFiFMcuymYD_LjugAwjPaTfltv2dWhi-Q-K8FKj4Da-LCGnntH4FOTdbQqICAP3rssi4hEmb2sX0cX8IY8NhCKMOcAIvbDGZkZsz0wli8KxINgDAjo1k3HVoiu6K1rGU3KLyK2AMAME7I8TgCcNcccvU8-XQtoKoVRFxliiNlFNgZBslgn_nWyHzkm1F92SWlgTFcnggB9-khKtbQ7-turUVRJGntw9wFLQTvz1XbAsWKzA01DyerPE9rwasKKxO
Start your browser and connect to the dashboard
http://localhost:8001/api/v1/namespaces/kubernetes-dashboard/services/https:kubernetes-dashboard:/proxy/.

Install Helm Package Manager and PSO
NOTE: Make Sure You have configured ISCSI on both the Master and Worker nodes, As the nodes need to talk directory to the arrays.
# curl https://raw.githubusercontent.com/kubernetes/helm/master/scripts/get > install-helm.sh
Once downloaded, run the install-helm.sh script
# ./install-helm.sh
Create a values.yaml file to point to the Pure Storage FlashArray or clone the PSO git repo.
# git clone https://github.com/purestorage/helm-charts.git
Once download, cd to the helm-charts/pure-csi directory and modify the values.yaml file with the array details.
NOTE: Use curl to download the HELM package manager for Kubernetes, helm is required to install PSO ( Pure Storage Orchestrator
arrays:
   FlashArrays:
     - MgmtEndPoint: "10.226.224.112"
       APIToken: "aa009fd2-7686-7d48-8698-26b7eb2ae841"
NOTE: you can get the APIToken by running the following purity command
pureadmin list --api-token --expose
Before installing PSO create a kubernetes namespace for it.
# kubectl create namespace pso-namespace
NAME            STATUS   AGE
pso-namespace   Active   3h25m
PSO - Pure Service Orchestrator
The new Pure Service Orchestrator allows for smart provisioning over one or many arrays. On-demand persistent storage for developers or administrator. Storage is provisioned on the best array or adhering to your policies.
# helm install --name pure-storage-driver pure/pure-csi --namespace pso-namespace -f values.yaml
Check to make sure PSO has been installed by looking at the storage classes
# kubectl get storageclass
NAME         PROVISIONER   RECLAIMPOLICY   VOLUMEBINDINGMODE  ALLOWVOLUMEEXPANSION   AGE
pure         pure-csi      Delete          Immediate           false                  3h25m
pure-block   pure-csi      Delete          Immediate           false                  3h25m
pure-file    pure-csi      Delete          Immediate           false                  3h25m
Create a persistent volume to test PSO has been installed correctly. Create a yaml file, you can call it whatever you like, I'm creating one call pv.yaml
kind: PersistentVolumeClaim
apiVersion: v1
metadata:
  name: pure-claim2
spec:
 accessModes:
 - ReadWriteOnce
 resources:
  requests:
   storage: 10Gi
 storageClassName: pure-block
Create the Persistent volume called pure-claim2
# kubectl create -f pv.yaml
persistentvolumeclaim/pure-claim2 created
Lets log onto the Pure Storage Flasharray and confirm the volume has been created, note the last 4 digits on pure-claim2 volume, it matches the volume created on Pure.
# kubectl get pvc
NAME          STATUS   VOLUME                                     CAPACITY   ACCESS MODES   STORAGECLASS   AGE
pure-claim    Bound    pvc-ae2e290a-1ecd-48db-ad7e-a44f89625897   10Gi       RWO            pure-block     155m
pure-claim1   Bound    pvc-a1ce6db8-8d20-40bb-a114-32bf6478f1c5   10Gi       RWO            pure-block     153m
pure-claim2   Bound    pvc-fb024008-1f28-497a-937d-be0987e5a9d0   10Gi       RWO            pure-blo


Comments